
Article: Descriptors and Your Qualitative Data Analysis—Part 2: How to Manually Create Descriptors
Tags
- All
- Training (4)
- Account Management and Security (9)
- Features of Dedoose (9)
- Dedoose Desktop App (1)
- Dedoose Upgrades and Updates (5)
- Dedoose News (6)
- Qualitative Methods and Data (11)
- Other (5)
- Media (5)
- Filtering (5)
- Descriptors (10)
- Analysis (22)
- Data Preparation and Management (20)
- Quantitative Methods and Data (5)
- Mixed Methods (20)
- Inter Rater Reliability (3)
- Codes (26)
- Tags:
- Descriptors
- Mixed Methods
- Codes
1/30/2013 Manually Creating Descriptors in your Qualitative Data Analysis
Now that you have read ‘Part 1: The Lingo,’ you should understand the basics concerning what descriptors are and why you would want to use them when organizing and analyzing your mixed methods or qualitative data analysis.
When it comes to adding descriptors into your qualitative data analysis, there are two ways of going about it: you can add descriptors manually or via Excel import. In ‘Part 2: The Manual Guide to Creating Descriptors,’ we will explain how to create descriptors manually within Dedoose!
Step 1: Enter the Descriptor Workspace
To begin, open the Descriptor Workspace by clicking the descriptors icon in the features bar. This is located at the top right of your screen. We will be working exclusively in this workspace to create, edit, and delete descriptors in your project.
Step 2: Add a Descriptor Set
Let’s first start by creating a Descriptor Set. As we explained in Part 1, the descriptor set can be thought of as a file folder that contains the group of descriptors you are about to create. For now, we want to create a descriptor set that will include the demographic information for our participants so we can add a descriptor set and title it ‘Participants.’
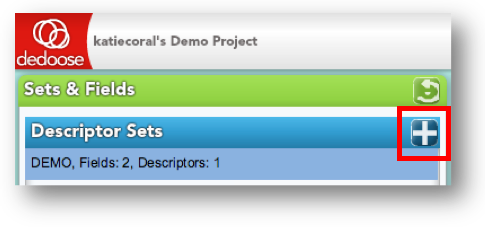
Start by clicking on the icon in the Descriptor Sets panel to add the new descriptor set.
Now, add a title to the set. It is helpful to have a descriptive title so that you can easily see the different levels of your analysis.

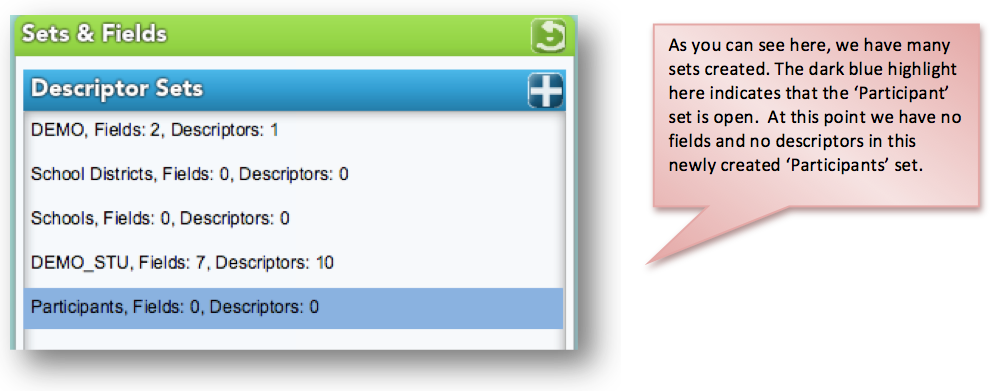
Once you hit ‘Submit’ your new set will appear in the ‘Sets & Fields’ section of the Descriptor Workspace.
If you have decided to create all your sets at this stage, be sure to click on the Set for which you want to add descriptors before moving to the next step.
Step 3: Add Fields/Variables
Now we need to add what are called fields or variables. These two terms, are often used interchangeably. For the purpose of this clarity in this blog, we will call these ‘fields’ moving forward.
To start, go to the ‘Set Fields’ section of the workspace shown below. It is located at the bottom left of your Descriptor Workspace.

Select the ‘Add’ icon to create a new field. This will open a pop up window from which you can add a title for your field, a description if desired, and answer choices (option list values) for categorical data. If you are creating a dynamic field to show change over time you can check the box for ‘dynamic field.’
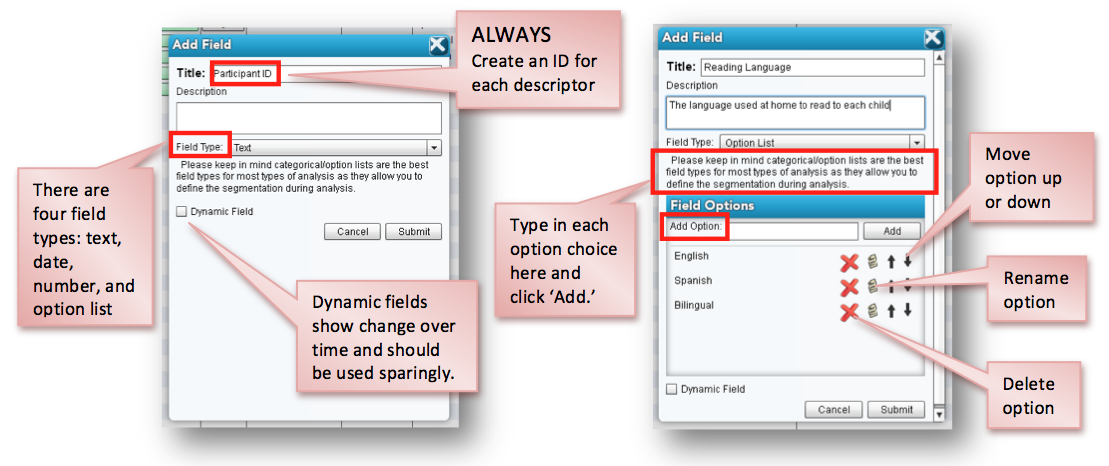
Field titles are required. Descriptions are optional, but may be helpful if you are working collaboratively within a team environment.
There are four field types: text, number, date, and option list. It is recommended that you create option lists wherever possible as they allow you to define your segmentation during your analysis stage. We recommend creating cutoff points for any continuous data so that they can be represented via investigator controlled categories in Dedoose analytics.
For example, you can examine the range of a numerical ‘age’ variable, decide on some subset of categories that will be useful and meaningful in your analysis, and then convert the numbers to categories (i.e., 8-12 years = child, 13-22 years = adolescent, 23-30 years = young adult, and 31+ years = adult). Under most circumstances, you’ll be much happier (and your data more transparent) in Dedoose if you carry out this conversion prior to bringing in the descriptor data.
NOTE: It is VERY important that you create an ID field for each descriptor. Later in your analysis you may want to export your descriptor information via excel. If you make any changes and want to RE-import your descriptors you will need an ID field to ensure that every descriptor links back up to the proper media file. We will explain how to use excel to add, edit, or delete descriptors in part 3 of this blog series.
Step 4: Add Each Descriptor/Case
Go to the section in the middle of your screen that reads ‘Descriptors In Set’ and click the ICON to add a new participant, which we call a descriptor or case.
![]()
A pop up window will appear showing each field you have created for this descriptor set. Now, list your answers by entering the text, number, or option and click ‘Submit.’
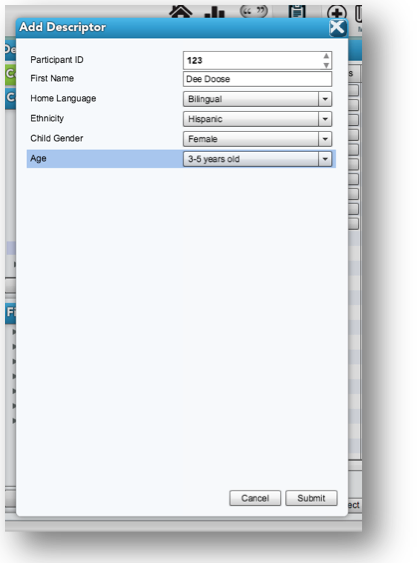
Repeat step 4 for each of your participants. When you are done your workspace will show all your descriptors listed for your set.
Step 5: Link Your Media
Now that you have all your participants listed, you need to link each descriptor to the proper media or resource (e.g. document, video, or audio).
When you start out, none of your descriptors will be linked. In the photo below you will see that in the ‘Linked Media’ column you can see what descriptors have been linked. When you enter a new descriptor there will be a RED ‘0’ in the ‘Linked Media’ column just like our new descriptor Dee Doose shown below.

To link media click on the RED ‘0.’ This will open a pop up window that lists all of your media. When you find the media that corresponds with the descriptor you are linking click on the button that says ‘Link.’ Each document can only be linked to one descriptor per descriptor set.
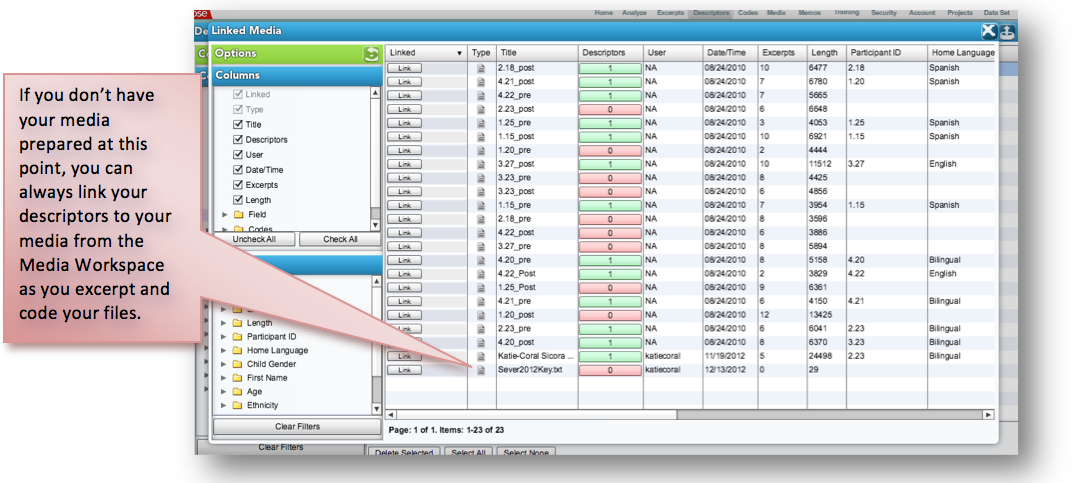
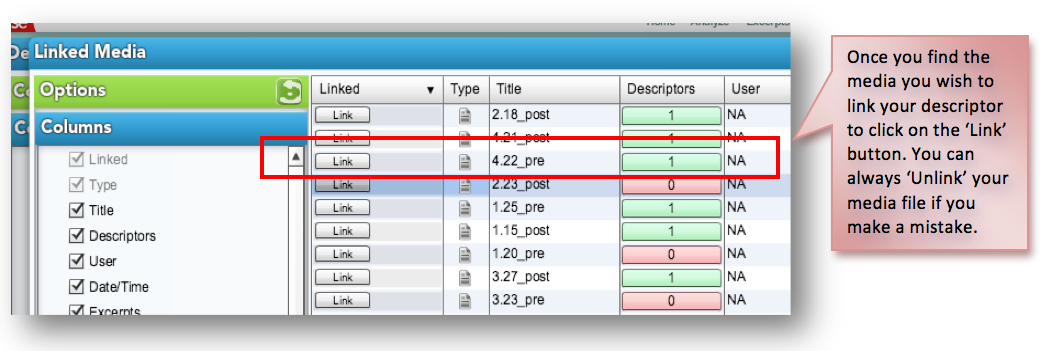
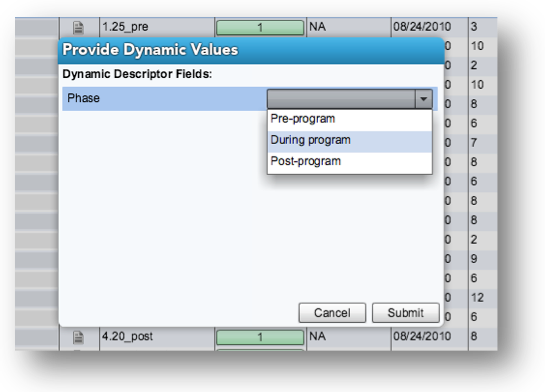
If you have decided to use a dynamic descriptor field you will be prompted to add the data point at this time. Let’s assume that we are speaking to our participants at three different times throughout our study. At this point we will be prompted to select which ‘Phase’ this media file pertains to.
All Done!
Now that you have completed these five steps you should have been successful in manually adding descriptors to your project. We hope that you have found Part 2 of this series helpful! If you have any questions on this process or any tips you want to share let us know on Facebook! Oh, and share our page with your friends while you are there! You can share ideas on Twitter using #dedoose and #descriptors.
In 'Part 3: Creating Descriptors Using Excel,' we will discuss how to use Excel to import your descriptor fields and cases. If you have many fields or descriptors using Excel can streamline your process considerably!
Happy Dedoosing!